Don’t be scared by the “Homemade”. I recently made my own almond milk and I don’t think I’ll ever go back to the store bought brand again.
Check out the simplest recipe and my pro tips on how to make your homemade almond milk taste WAY better than Silk,
What you’ll need:
1 cup almonds
4 cups filtered water
Quantity, just eye ball Honey for sweetener (Optional)
***** 1 tsp vanilla extract (DON’T SKIP THIS)
Cheesecloth (available at grocery stores like Whole Foods, Safeway, etc)
First step (and the longest part of the process), you have to let your 1 cup of almonds sit in water in an airtight container for at least 24 hours. Mine sat for 36, but everything still turned out fantastic. So just make sure they’re in the fridge for 24 hours and you’re golden. The amount of water they sit in just depends- I just filled up my airtight container to the top with water after putting in the almonds.
After your almonds have soaked in water, it’s time to blend them with the 4 cups of filtered water. Strain your almonds and place them in a powerful blender. I used a food processor, so whatever blade you’ve got in whatever machine that’s the sharpest, use it to blitz your almonds.
Once your almonds are blended as fine as you can get them it’s time to strain. Although you may feel too trendy and hipster storing your homemade almond milk in a mason jar, I do recommend some type of airtight glass container for storage. Place the cheesecloth over the top of the opening to your jar of choice and strain the almond milk through, catching all your almond pulp in the process.
–> If you’re feeling really Laura Wilder Little House on the Prairie, save that almond pulp and put it in the oven at about 200F for a little bit and dry it out into almond flour. When I get a chance to do this, I’ll post about it. Til then, feel free to be adventurous and try it on your own.
Make sure you squeeze the cheesecloth to ensure you’ve got all the almond milk. Then, add honey (if you so choose) and stir as well as adding the vanilla extract. The vanilla extract is important to ensure your almond milk is delicious and tasty. So don’t skip that step. If sweet almond milk isn’t your thing, skip the honey. I added honey to mine so I strongly recommend doing so, but it’s personal choice.
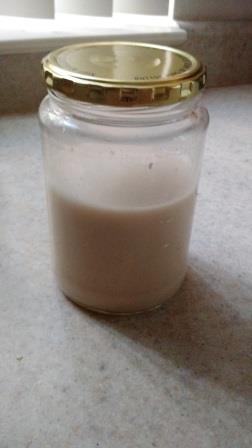
Yay, you’re done! Now you can enjoy your preservative free almond milk for 3 days, as long as you’re storing it in an airtight container in the fridge. You can always double or triple the recipe for a bigger serving size, but I ended up with enough almond milk for the 3 days that I would use it.
Also, here’s a link to the recipe I used (found on Pinterest, one of the greatest sites ever invented by man).
I make and gather a lot of recipies on Pinterest, so if you’re ever curious about other super cool homemade healthy dishes you can make, go on over and follow my “What is Healthy” board on Pinterest. My goal is to eventually make everything I pin on Pinterest. It obviously won’t look as beautiful, but it’ll probably still taste delicious.
Follow Amanda’s board What is Healthy on Pinterest.
Next time you are home you need to make this for me!